基于 V2Ray 的路由器透明代理配置
1. 清单
- 路由器 : ASUS RT-AC68U
- 系统版本: RT-AC68U_384.13_1-koolshare-20190823.trx
- V2Ray 版本: v4.20.0 ( v4.20.0 过后开始使用 go 1.13+,官方编译的暂时不能在 ARMv7 执行)
2. 未解决问题
go 1.13+ 运行 Illegal instruction 问题: 需要开启FPU (Emulator)https://github.com/v2ray/v2ray-core/issues/843
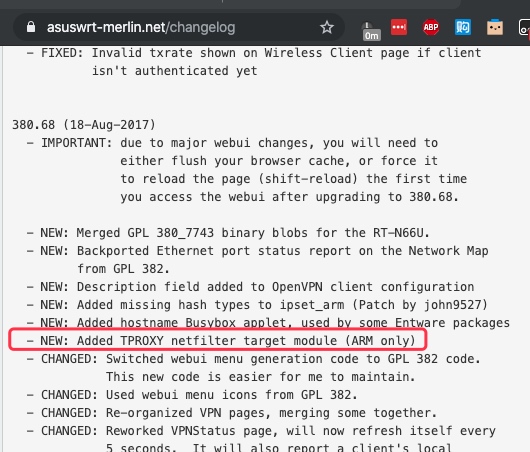
merlin 固件从 380.68 (18-Aug-2017) 就内置了 TPROXY 模块,但是需要手动加载。但是在使用 TPROXY 转发 UDP 流量,或者使用 V2Ray TPROXY 转发是,会出现 udp 转发死循环问题,暂时还没解决。参考:
- https://github.com/v2ray/v2ray-core/issues/1432
- https://github.com/v2ray/v2ray-core/issues/1671
- https://guide.v2fly.org/app/transparent_proxy.html
- https://guide.v2fly.org/app/tproxy.html#%E8%AE%BE%E7%BD%AE%E7%BD%91%E5%85%B3
2.1. 相关下载地址
2.1.1. V2Ray
v2ray-core 下载地址:
https://github.com/v2ray/v2ray-core/releases
注意选择对应版本,RT-AC68U 的版本是 v2ray-linux-arm.zip,下载后,上传到路由器。
2.1.2. RT-AC68U 固件
固件的内核有两个版本,384.xx(新的版本) 和 380.xx(老得版本) 两个版本,注意选择。
固件有三个版本: 华硕官方,原版 merlin 固件,还有安装软件市场的国内修改 koolshare 版本。
- 原版 merlin 下载地址: https://www.asuswrt-merlin.net/download
- koolshare 的下载地址: http://firmware.koolshare.cn/
注意: 梅林原版古剑,不带有 Software Center, 如果需要下载带有 Software Center 的固件版本,参考: https://github.com/koolshare/rogsoft
| 软件中心 | arm380软件中心 | arm384软件中心 | hnd/axhnd软件中心 | 软路由-酷软 |
|---|---|---|---|---|
| 项目名称 | koolshare.github.io | armsoft | rogsoft | ledesoft |
| 适用架构 | armv7l | armv7l | armv8(aarch64) | x64 |
| 平台 | arm | arm | hnd/axhnd | by fw867 |
| linux内核 | 2.6.36.4 | 2.6.36.4 | 4.1.27/4.1.51 | 很新 |
| CPU | bcm4708/9 | bcm4708/9 | bcm4906/8 | intel/AMD |
| 固件版本 | koolshare 梅林380 | koolshare 梅林384 | koolshare 梅林/官改 | OpenWRT/LEDE |
| 软件中心api | 1.0 代 | 1.5 代 | 1.5 代 | 1.5 代 |
| 代表机型-1 | RT-AC68U 改版梅林380 | RT-AC88U 改版梅林384 | RT-AC86U 改版梅林 | \ |
| 代表机型-2 | RT-AC88U 改版梅林380 | RT-AC5300 改版梅林384 | GT-AC5300 华硕官改 | \ |
| 代表机型-3 | R7000 改版梅林380 | RT-AX88U 改版梅林 | \ |
我的 AC68U 有两个版本,旧版的是 Koolshare_Merlin_Legacy_380(380.xx),新版的是 Koolshare_Merlin_New_Gen_384(384.xx),我选择下载的是 : https://koolshare.cn/thread-164857-1-1.html
3. 安装步骤
3.1. 安装V2Ray
将 v2ray-linux-arm.zip 压缩包上传到 路由器,然后解压到一个目录,配置 config.json 文件,使用 ./v2ray -config config.json 命令即可启动。
如果出现内存不够的错误,增加 swap 内存即可 :
1 | 创建要作为swap分区的文件:增加1GB大小的交换分区,则命令写法如下,其中的count等于想要的块的数量(bs*count=文件大小)。 |
配置 config.json 文件,参考: V2Ray 透明代理
配置好了,启动:
1 | chmod +x v2ray |
3.2. 配置 iptables
1 | !/bin/bash |
写入到一个脚本文件,然后执行脚本即可。
4. 开机自启动和定时监测
4.1. 创建定时监测脚本
1 | cat << EOF > /tmp/mnt/nas/v2ray/koolshare-v2ray-restart.sh |
4.2. 添加开机自启动
修改 /jffs/scripts/services-start
1 | cat << EOF >> /jffs/scripts/services-start |